Deploying Mobile Device Apps to Apple Silicon Macs with Jamf Pro
Apple made it possible to install iPhone and iPad apps to Apple Silicon Macs as soon as they were released. Since version 10.30 it has been possible to deploy these apps via Jamf Pro.
The method of adding an iPhone/iPad app to Jamf Pro for distribution to Macs is, however, not yet fully worked into the GUI. We need to add the app manually. Here’s how.
In this example we are going to use the iPad app named ETH Zürich.
Add the app to the Mobile Device Apps section
The easiest way to get the required information for adding the app manually is to add it as a regular Mobile Device app in your Jamf Pro Mobile Device Apps section. If you already have the app assigned to Mobile Devices, you can skip this section.
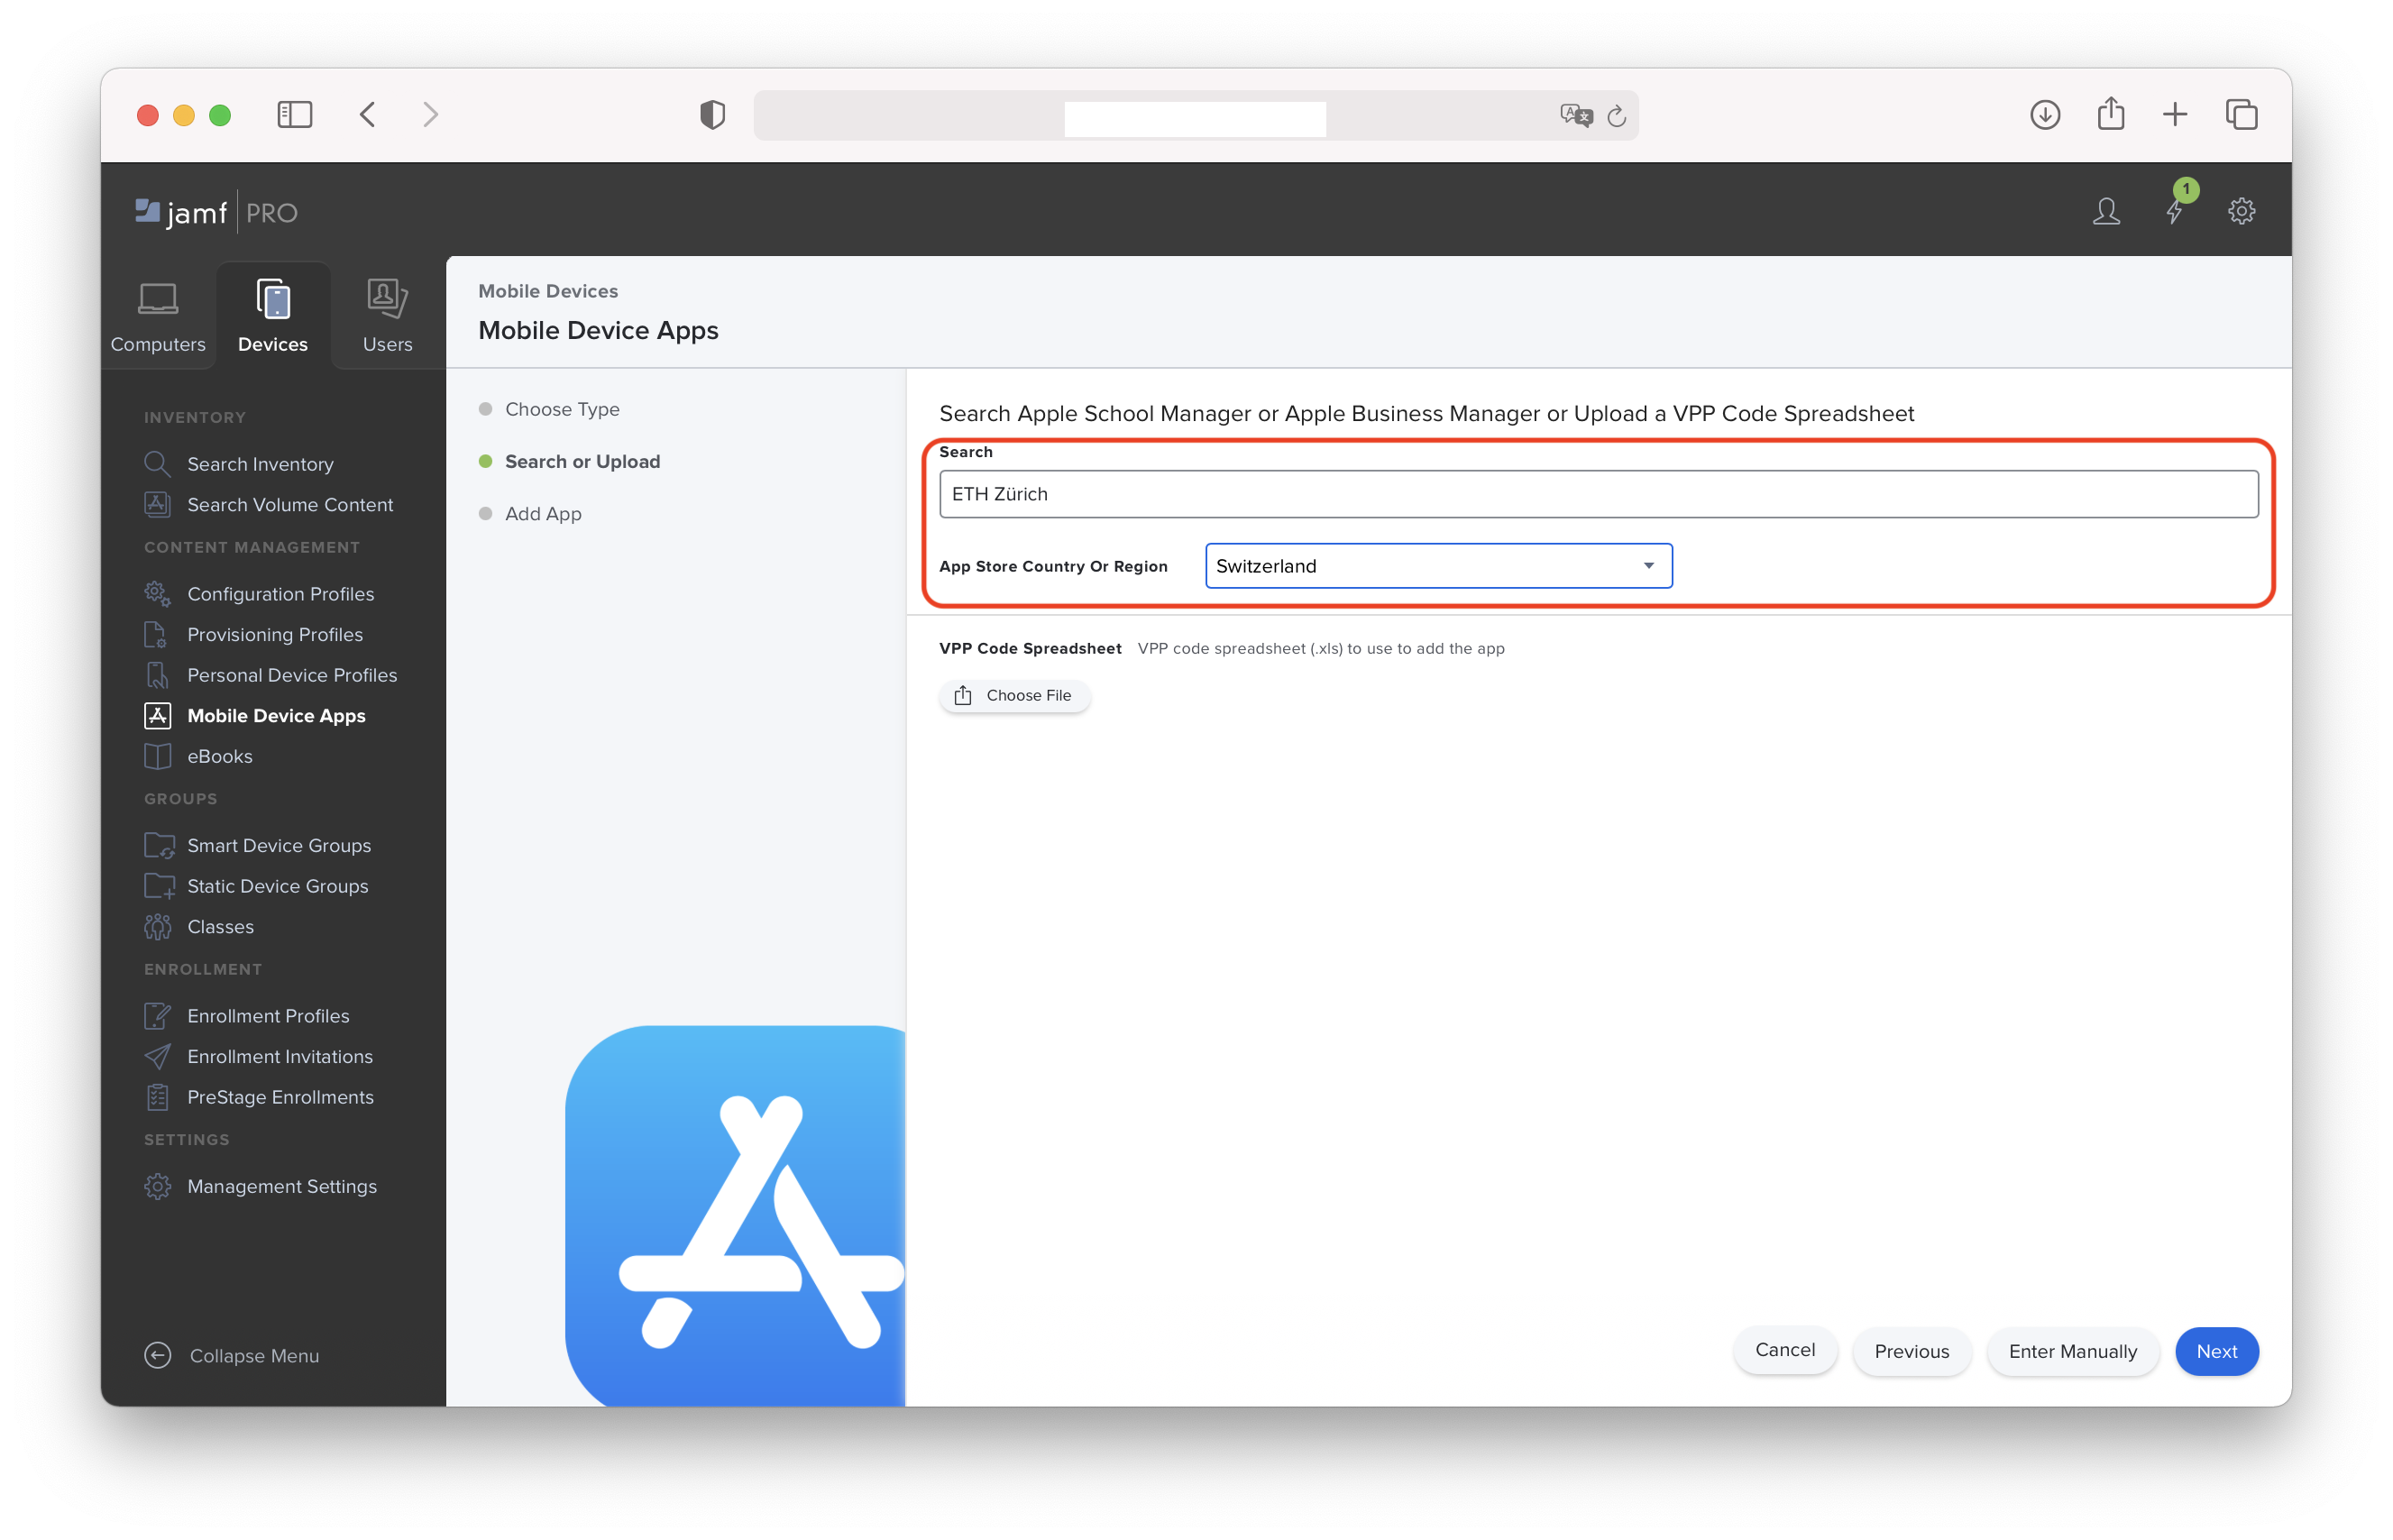
So, go assign some licenses for the iOS app to your Jamf Pro instance in Apple School Manager or Apple Business Manager, then go to the Devices -> Mobile Device Apps section. Click on + New, then select App Store App or apps purchased in volume, and click Next.
Next, search for the app (e.g. “ETH Zürich”), and select your region, then click Next.
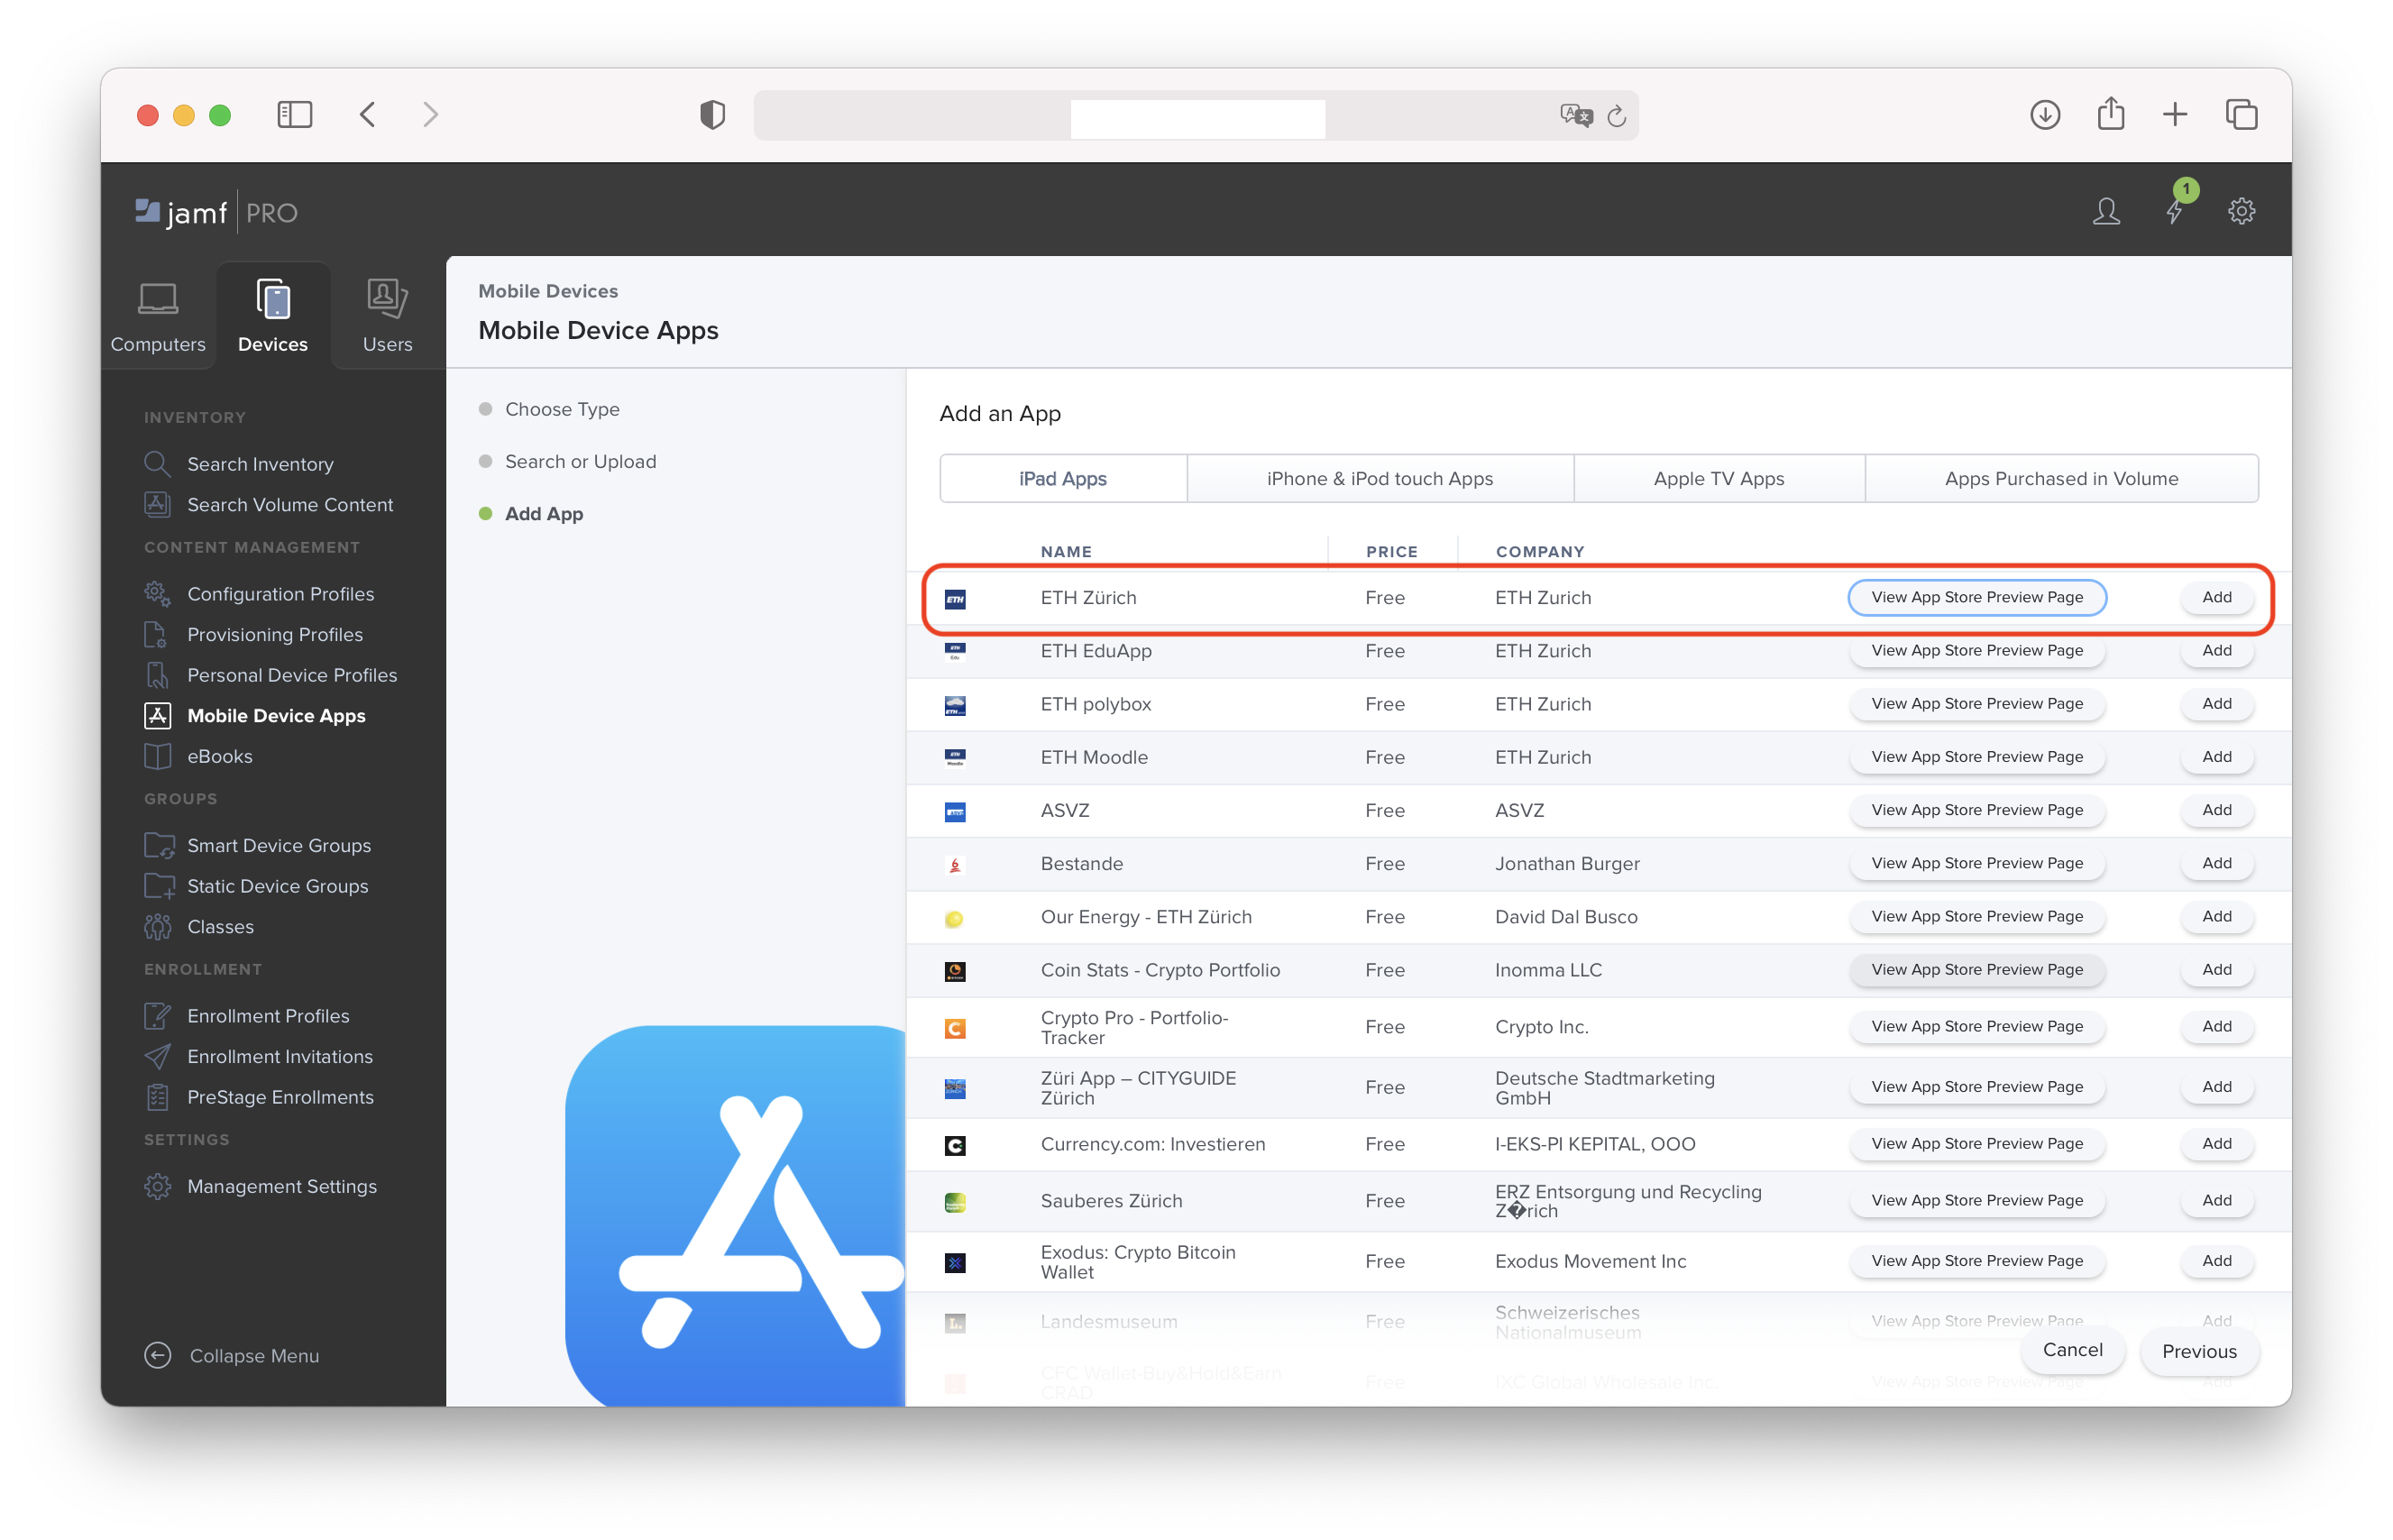
Find the app you want in the list and click on Add.
Add the app as an iOS app (you do not need to Save).
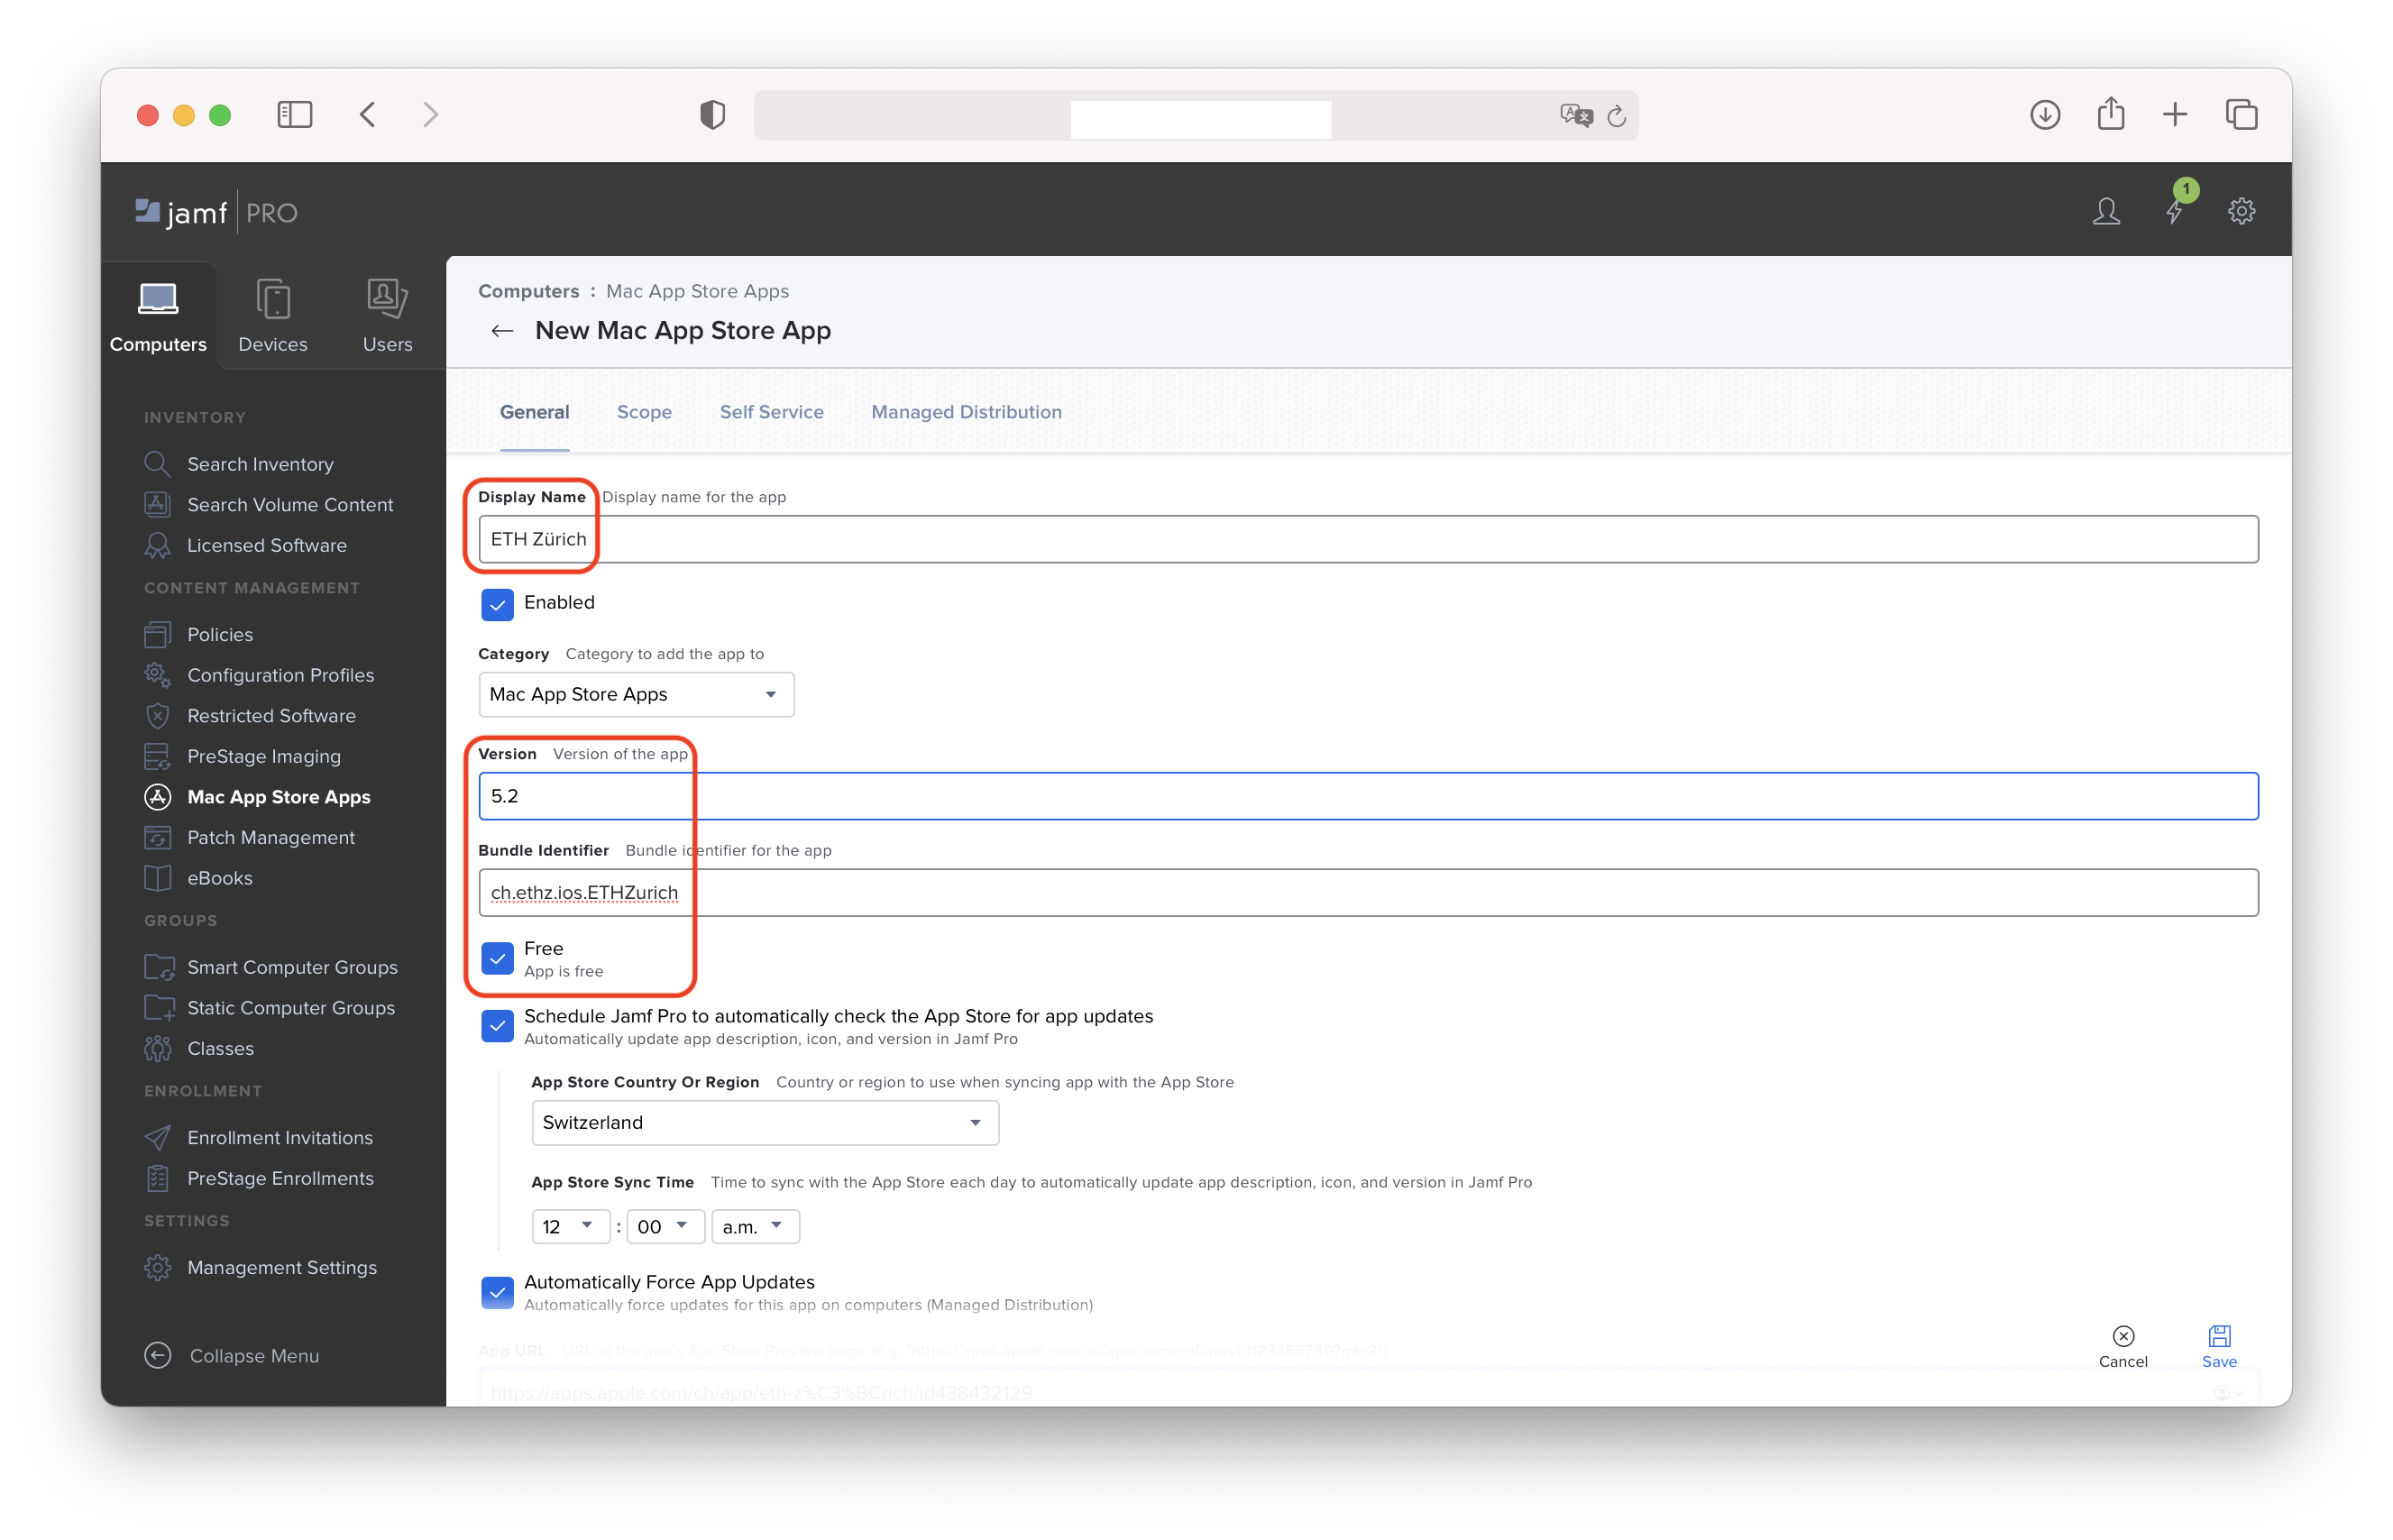
Get the required information from the Mobile Device App
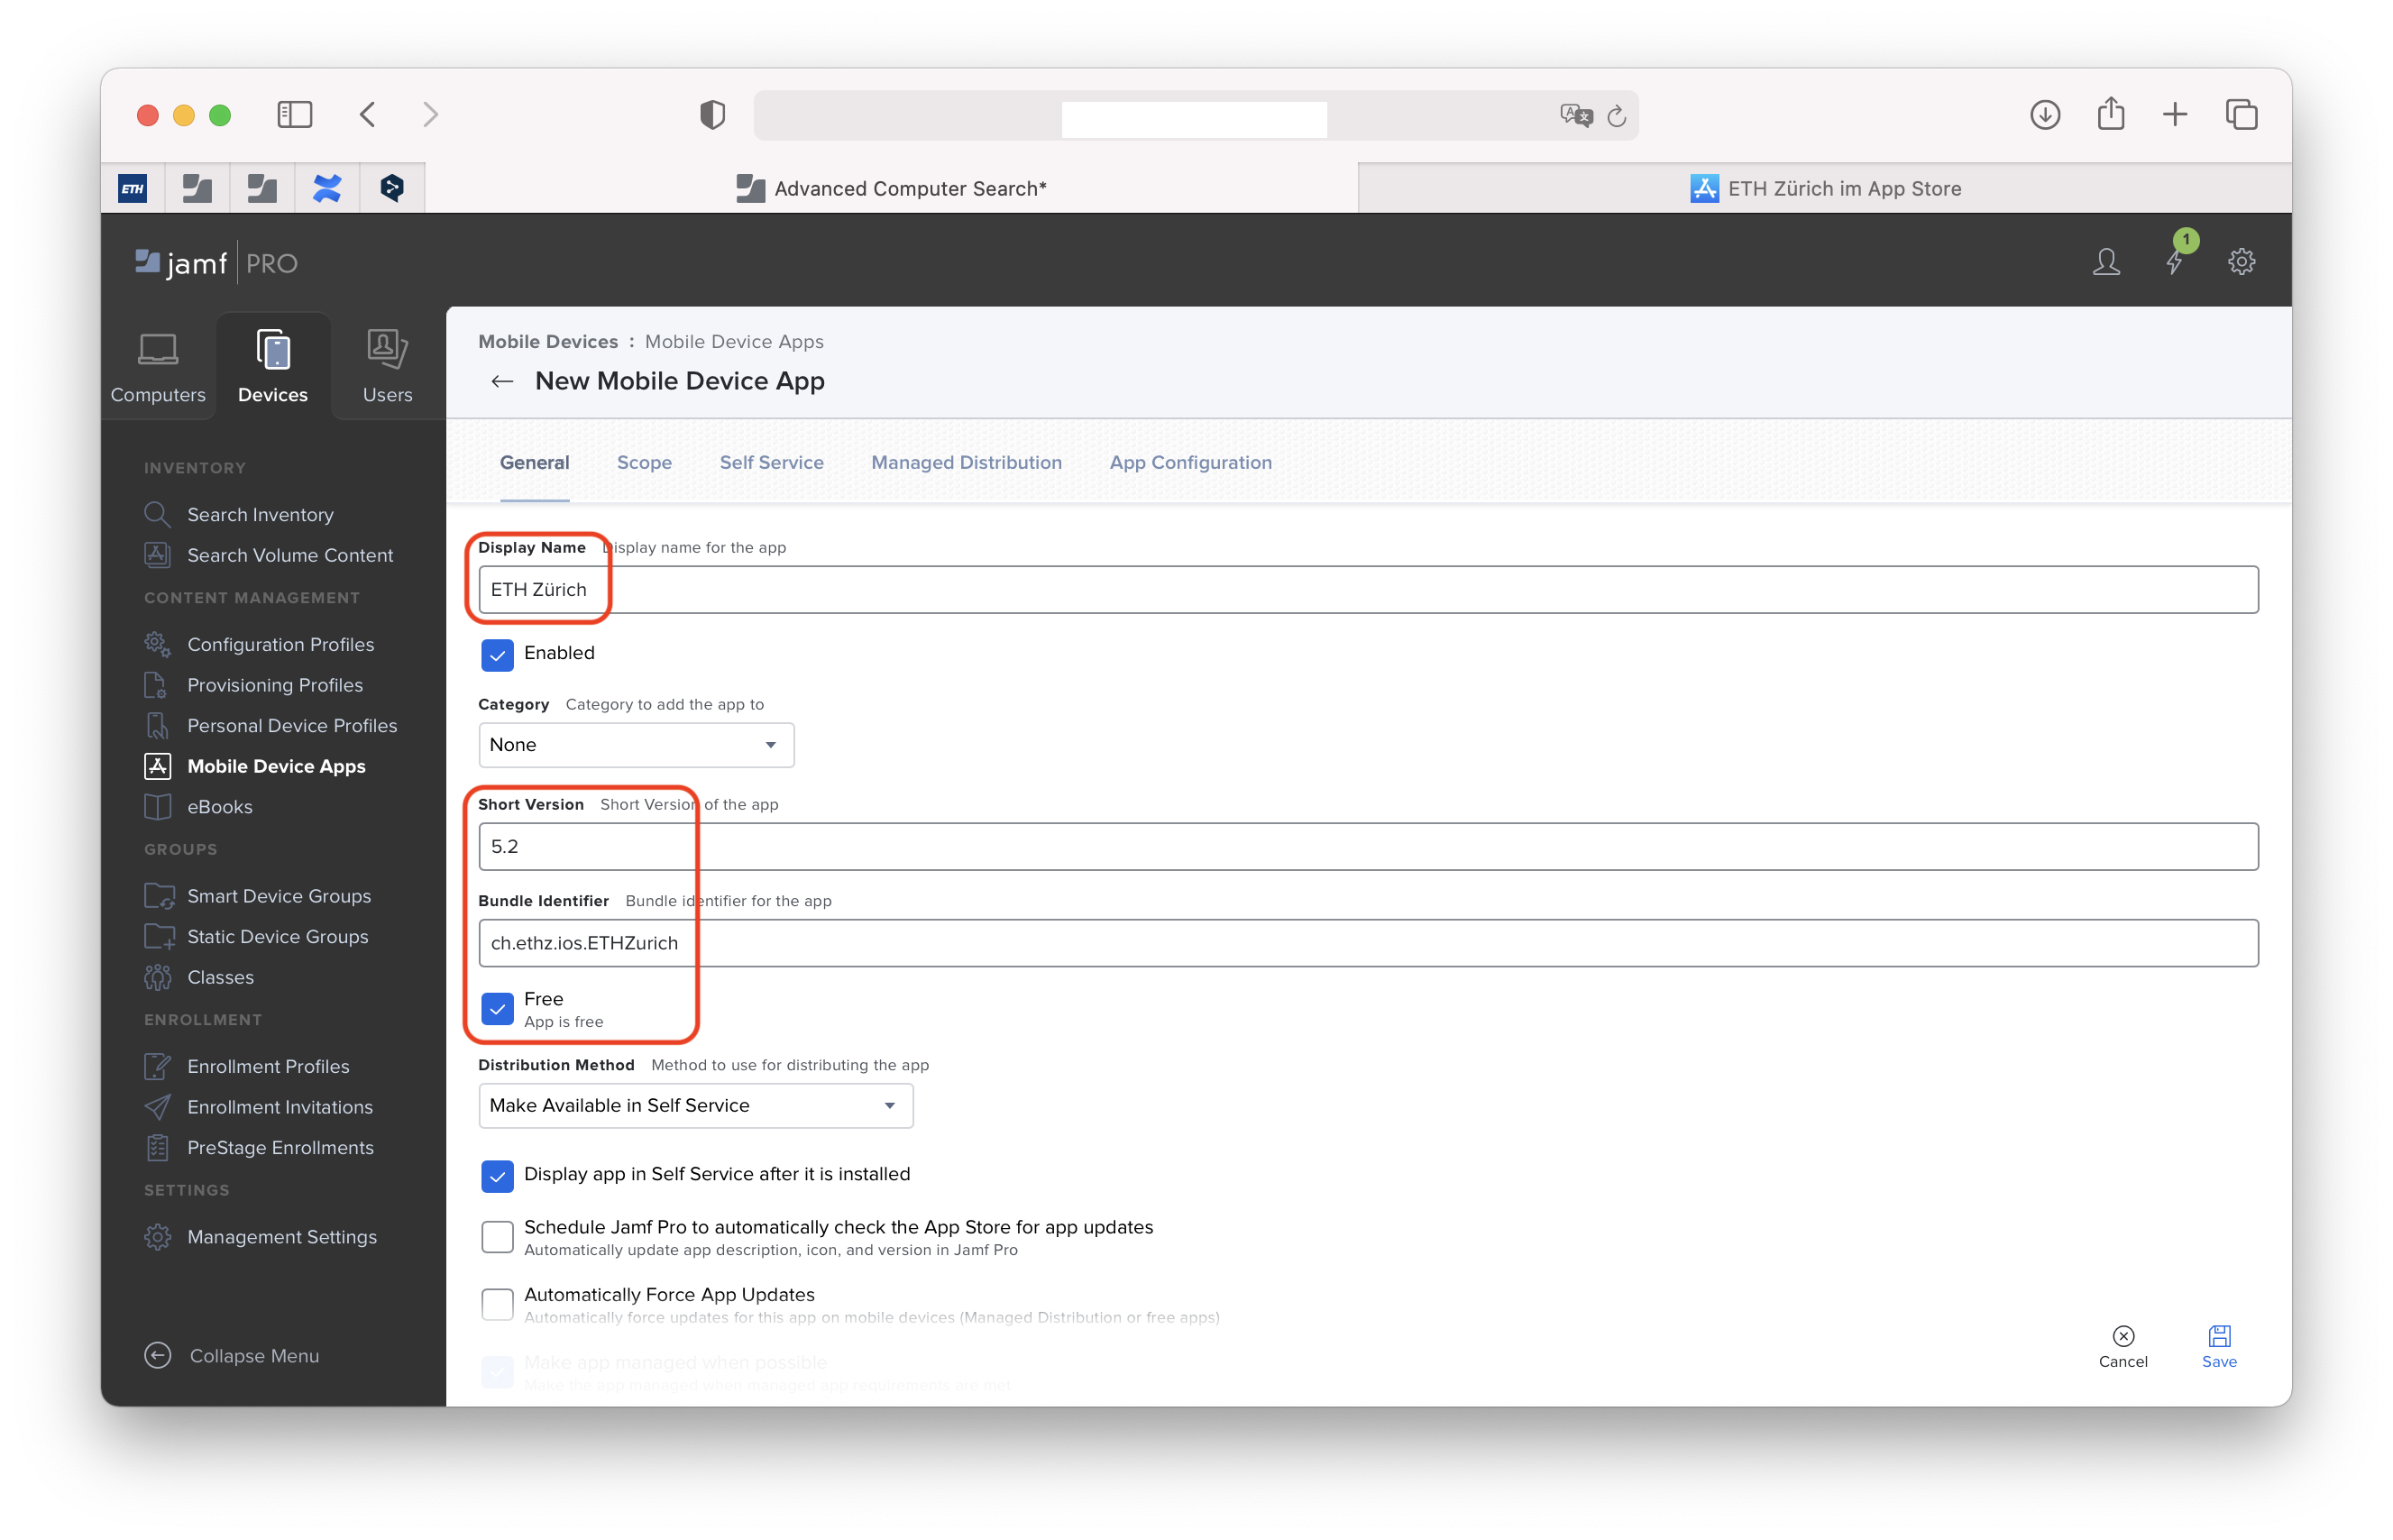
Once added, grab the values for:
- Display Name (
ETH Zürich) - Whether the app is free or not (Yes)
- Short Version (
5.2) - Bundle Identifier (
ch.ethz.ios.ETHZurich) - App URL (
https://apps.apple.com/ch/app/eth-z%C3%BCrich/id438432129)
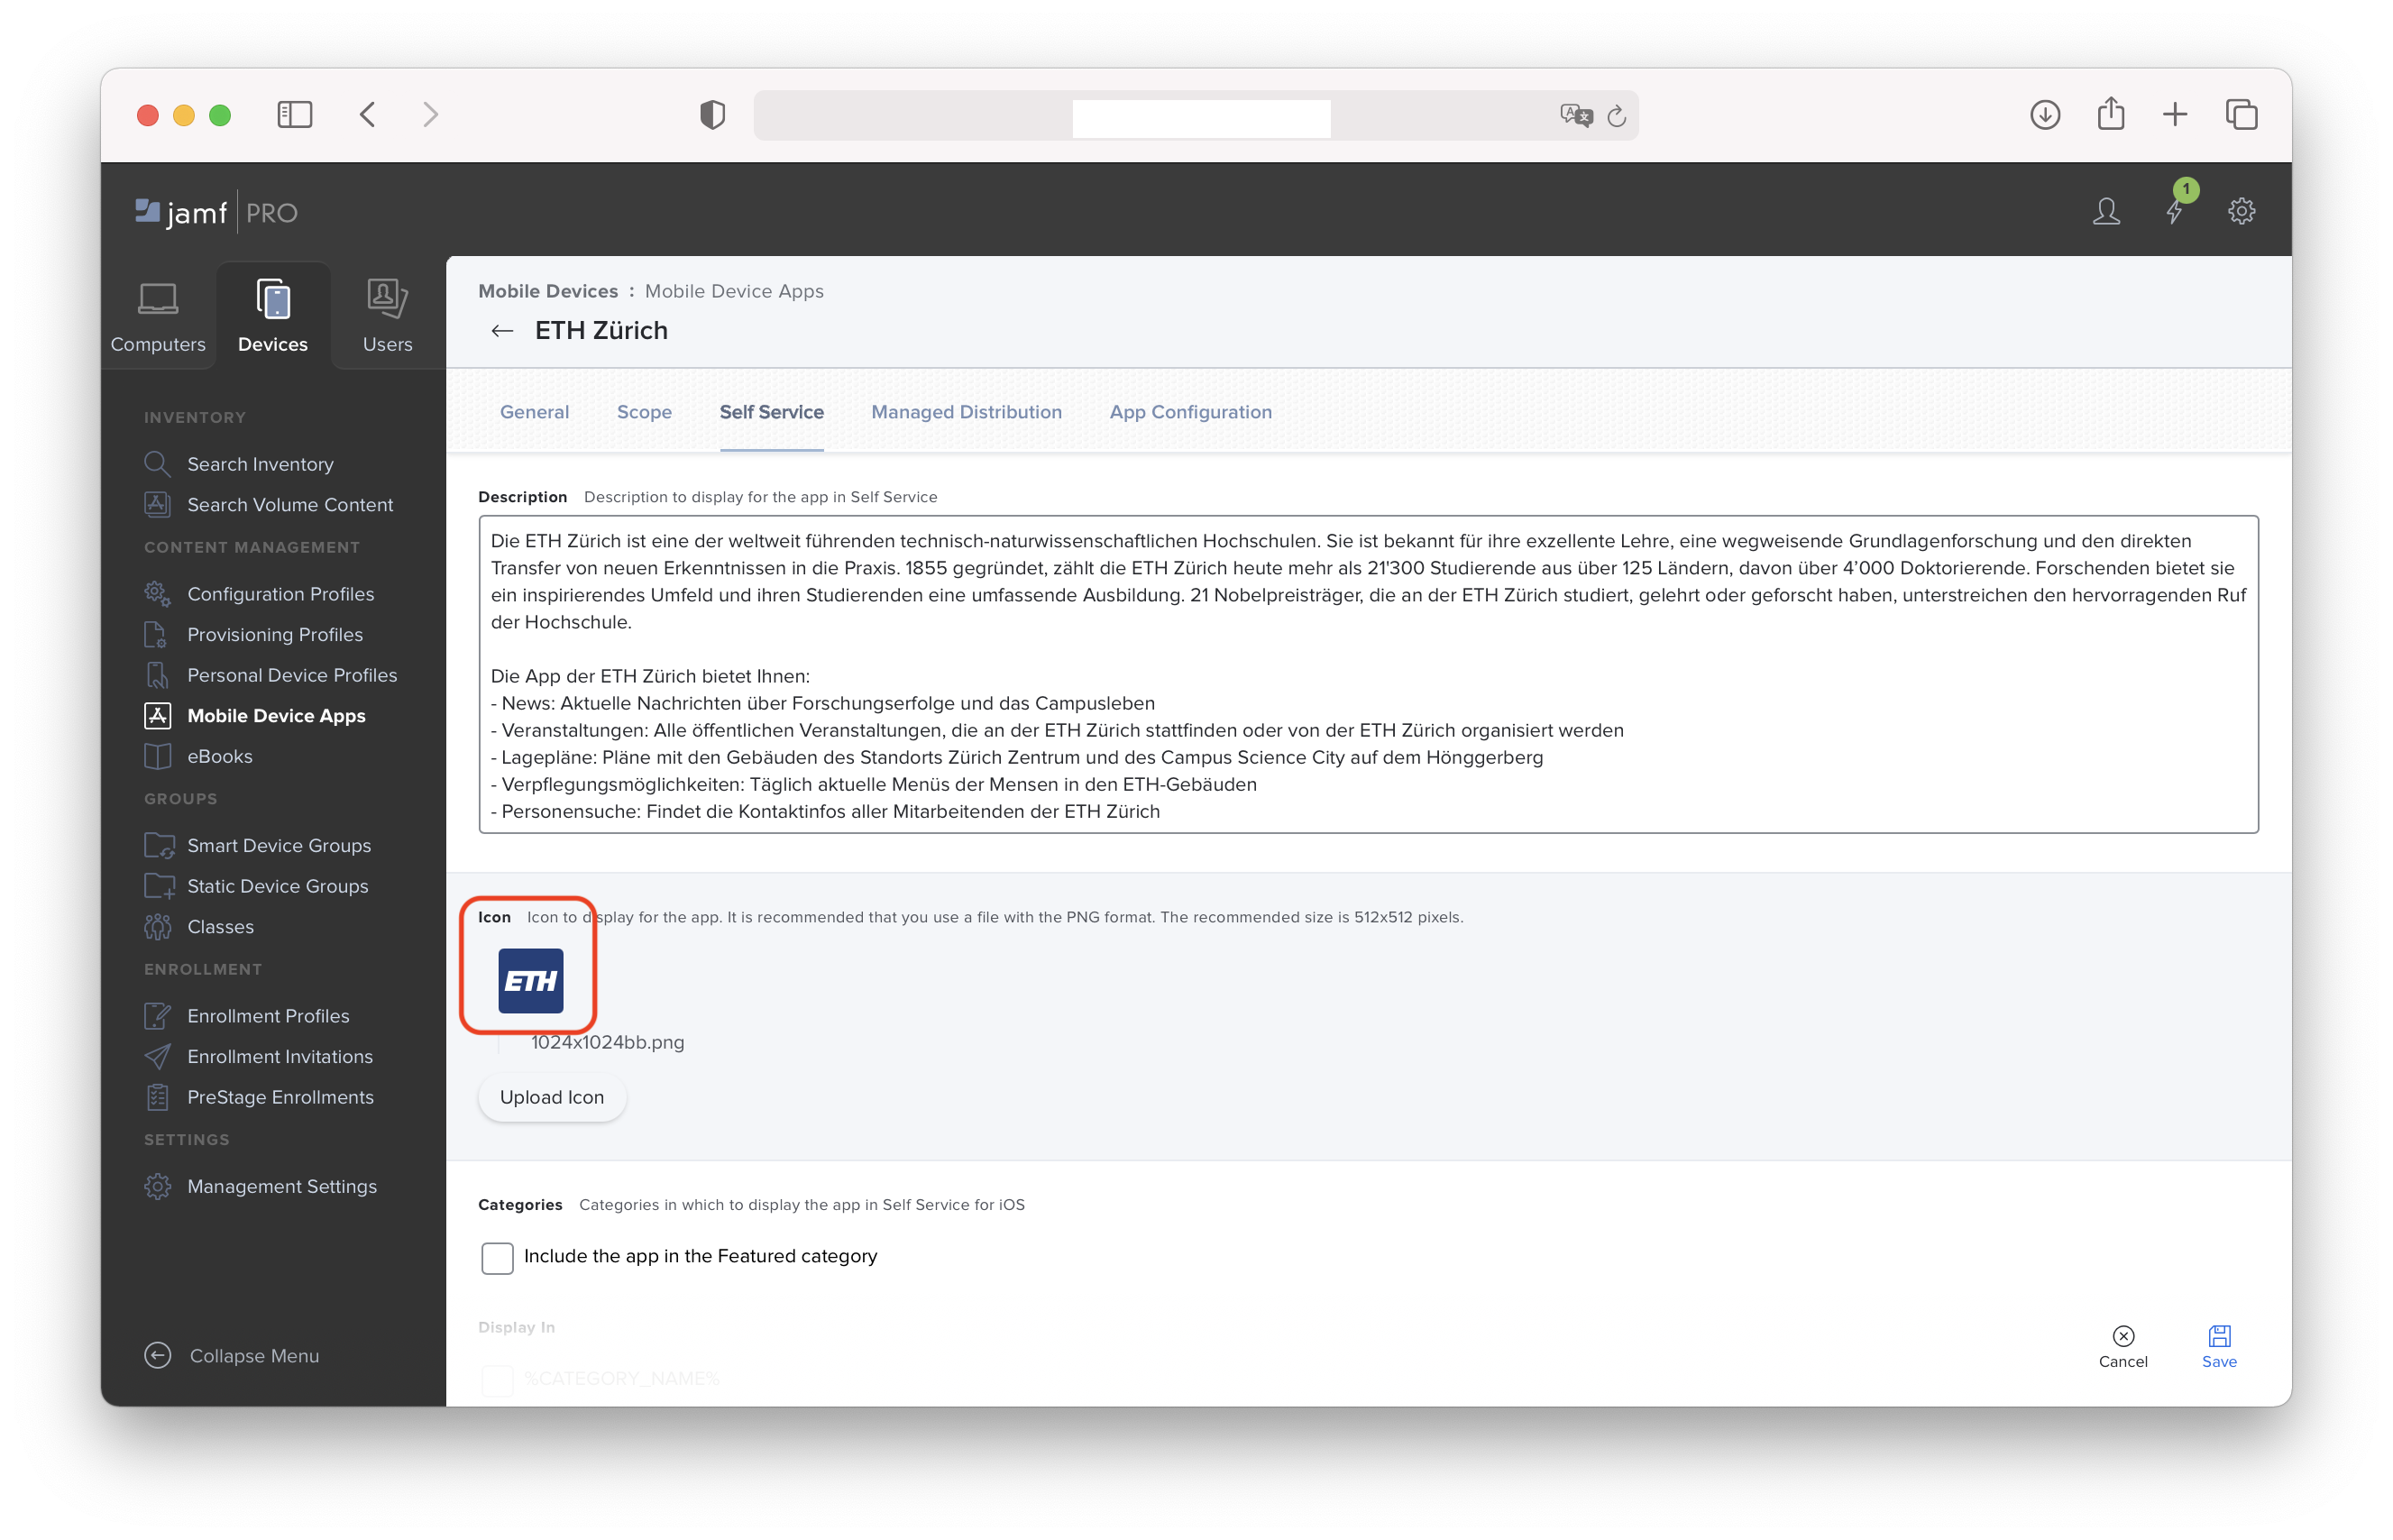
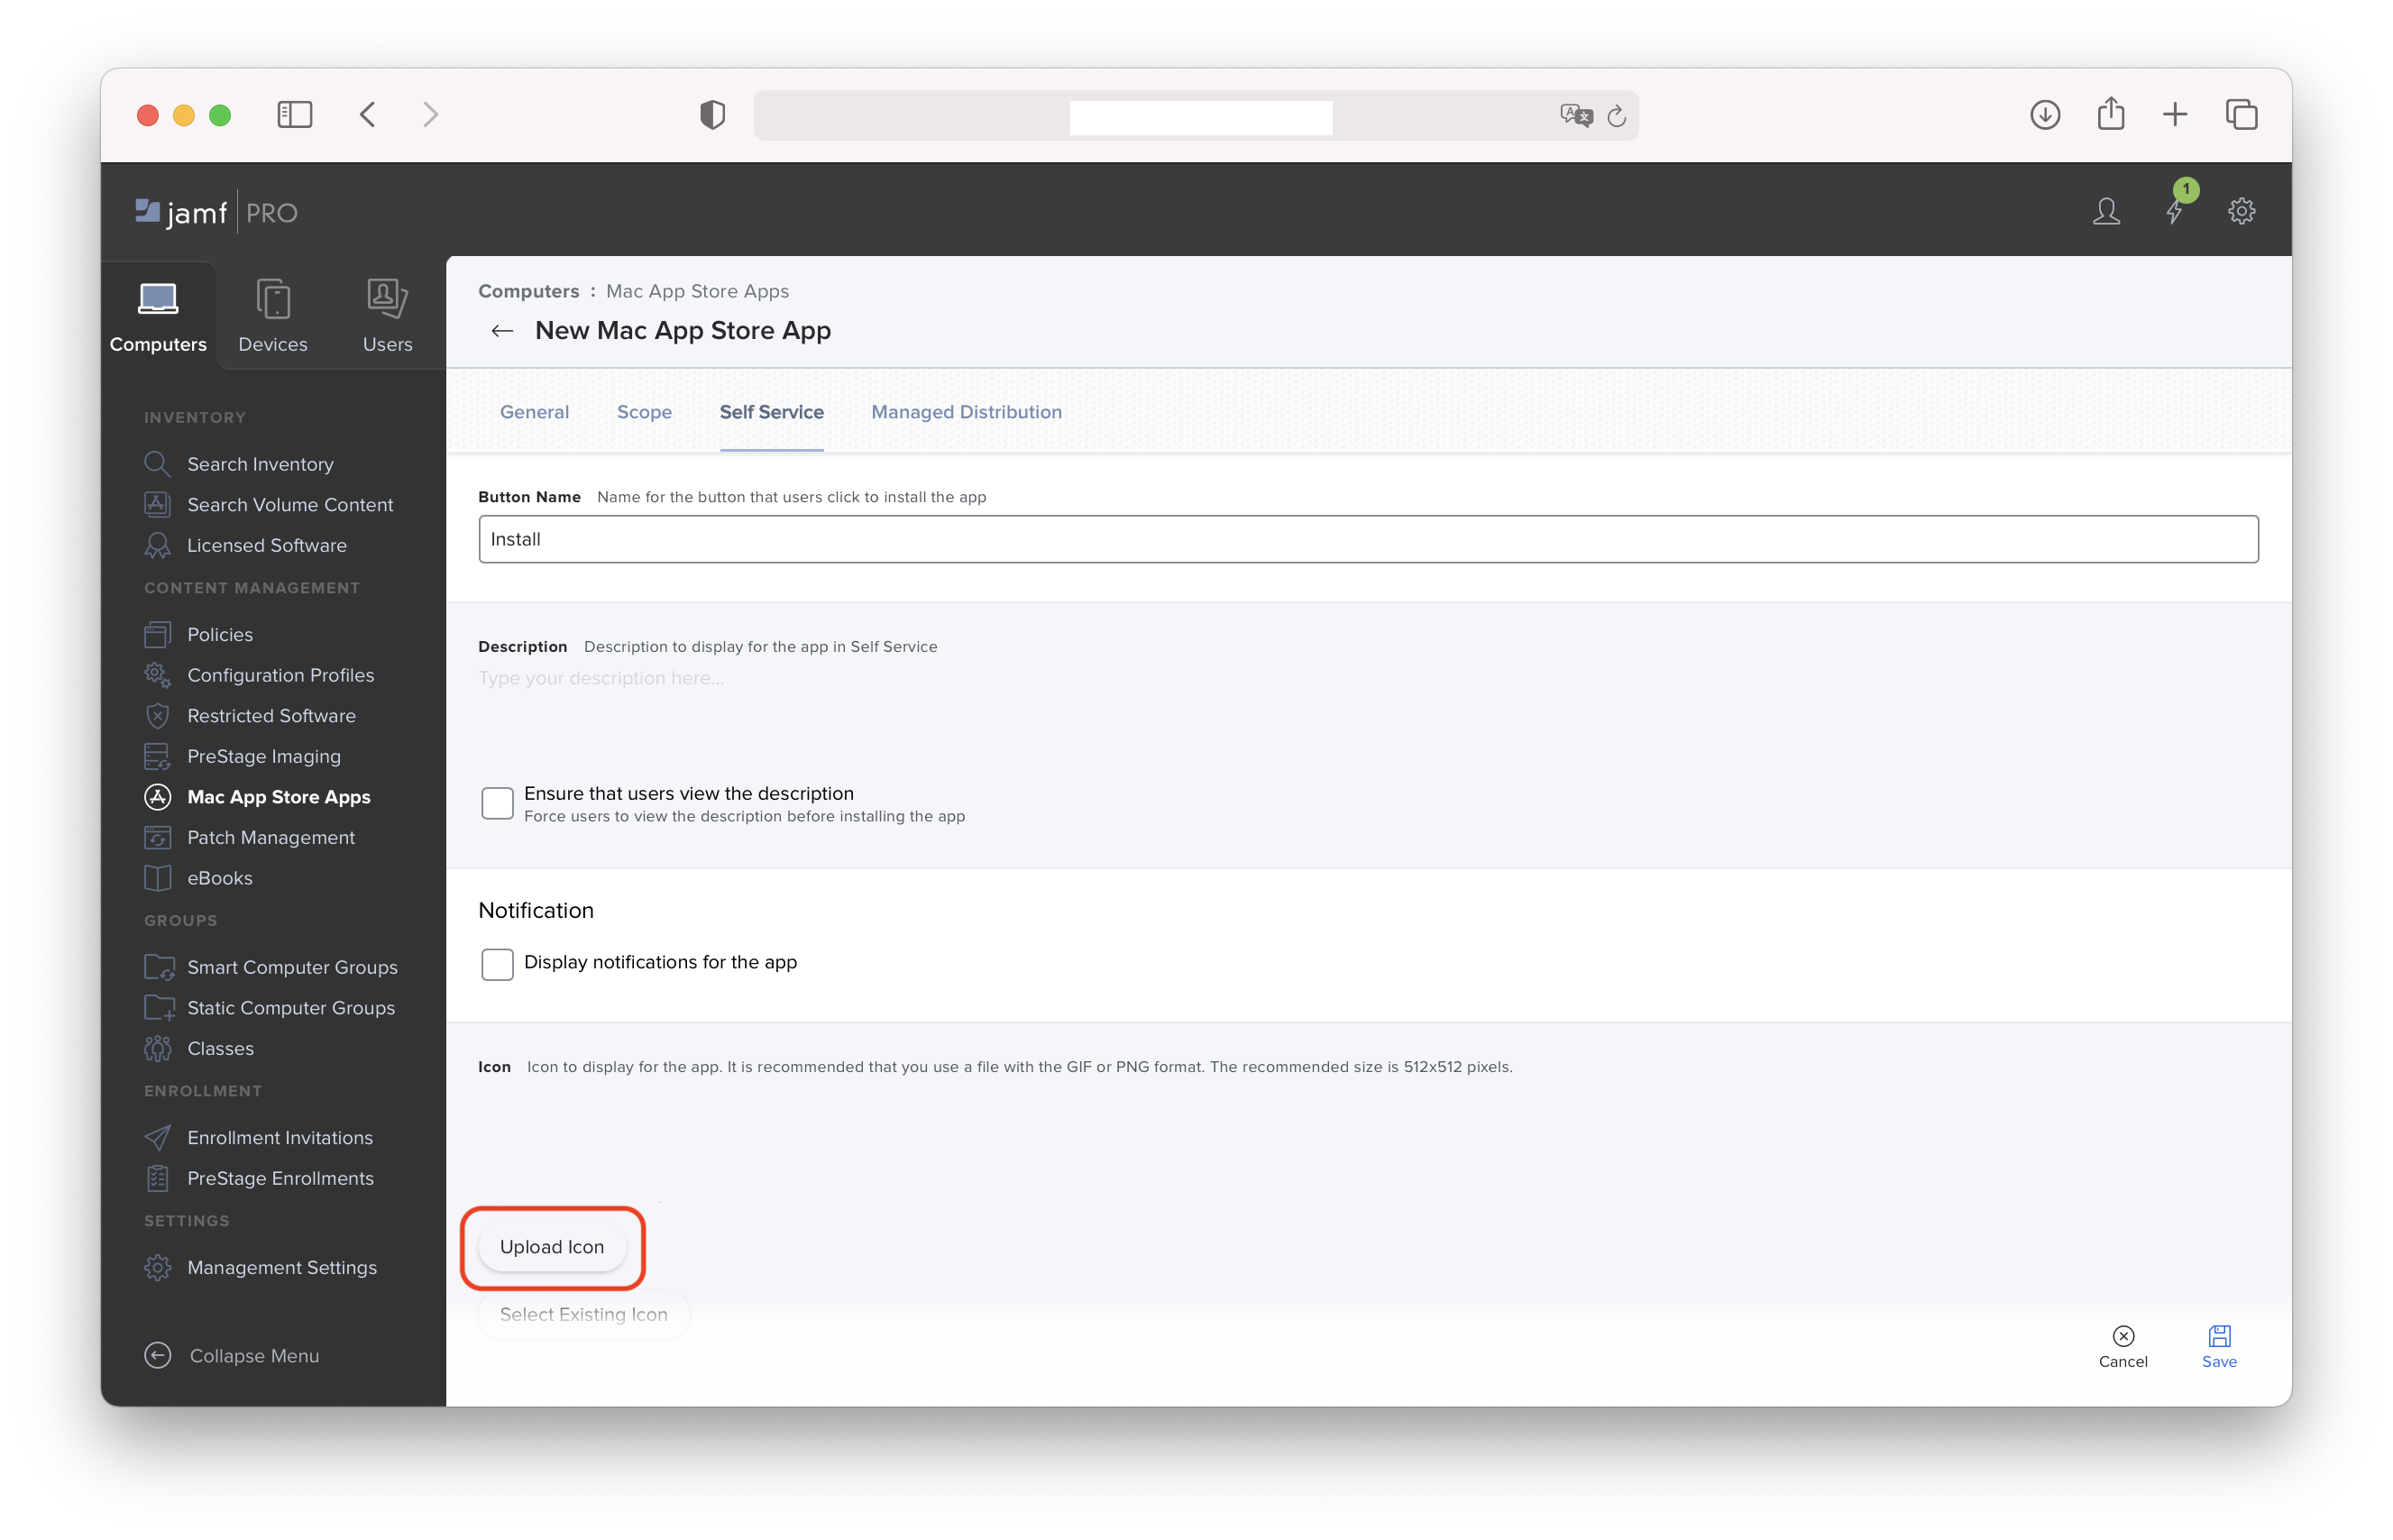
Next, click on Self Service, and right-click on the icon to save it on your computer. It is recommended to change the name to match the app, e.g. ETH Zürich.png.
If you intend to deploy the app to mobile devices as well as Macs, go ahead and scope the item and save it. If not, you can press Cancel.
Create the new Mac App Store App
Now we’ve gathered the required information, let’s go ahead and create the new Mac App Store App entry. Go to Computers -> Mac App Store Apps, and click + New, then click on Enter Manually. Enter the values you obtained from the Mobile Device Apps entry.
Upload the icon in the Self Service section, then click Save.
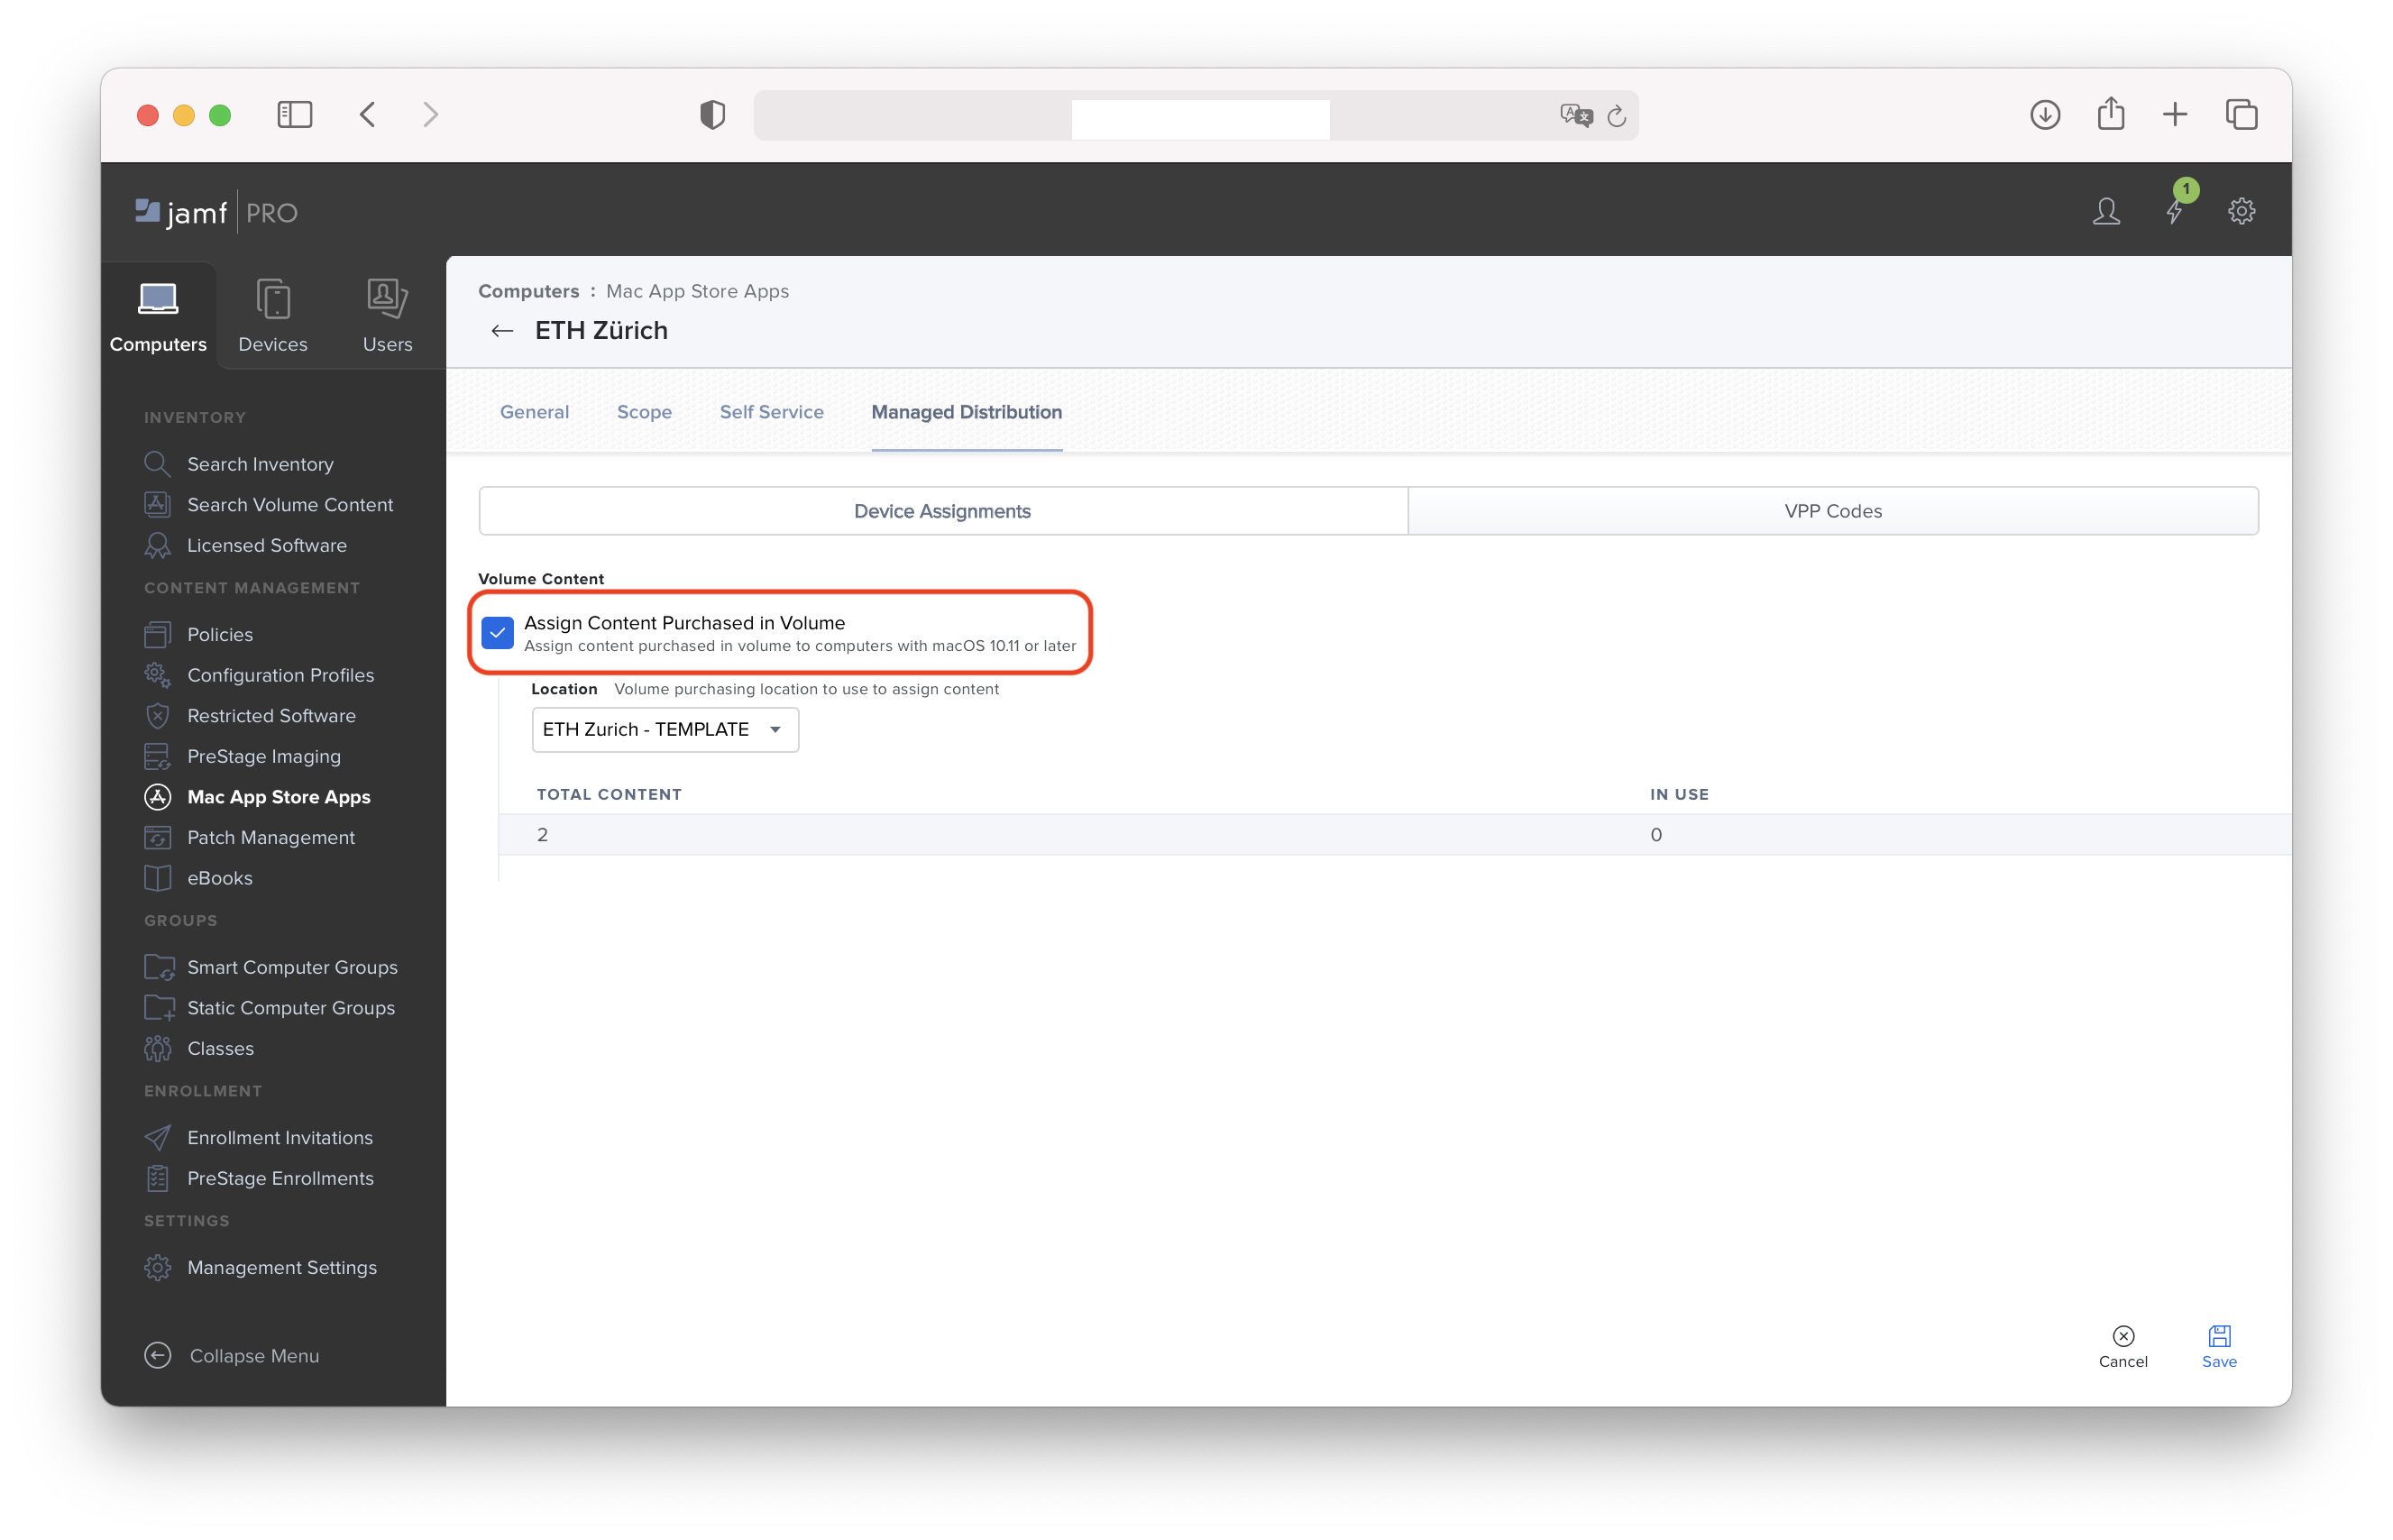
To assign VPP licenses, click Edit again, go to Managed Distribution, and check Assign Content Purchased in Volume. Now you can assign a scope and Save. Note that you should only scope to Apple Silicon Macs.
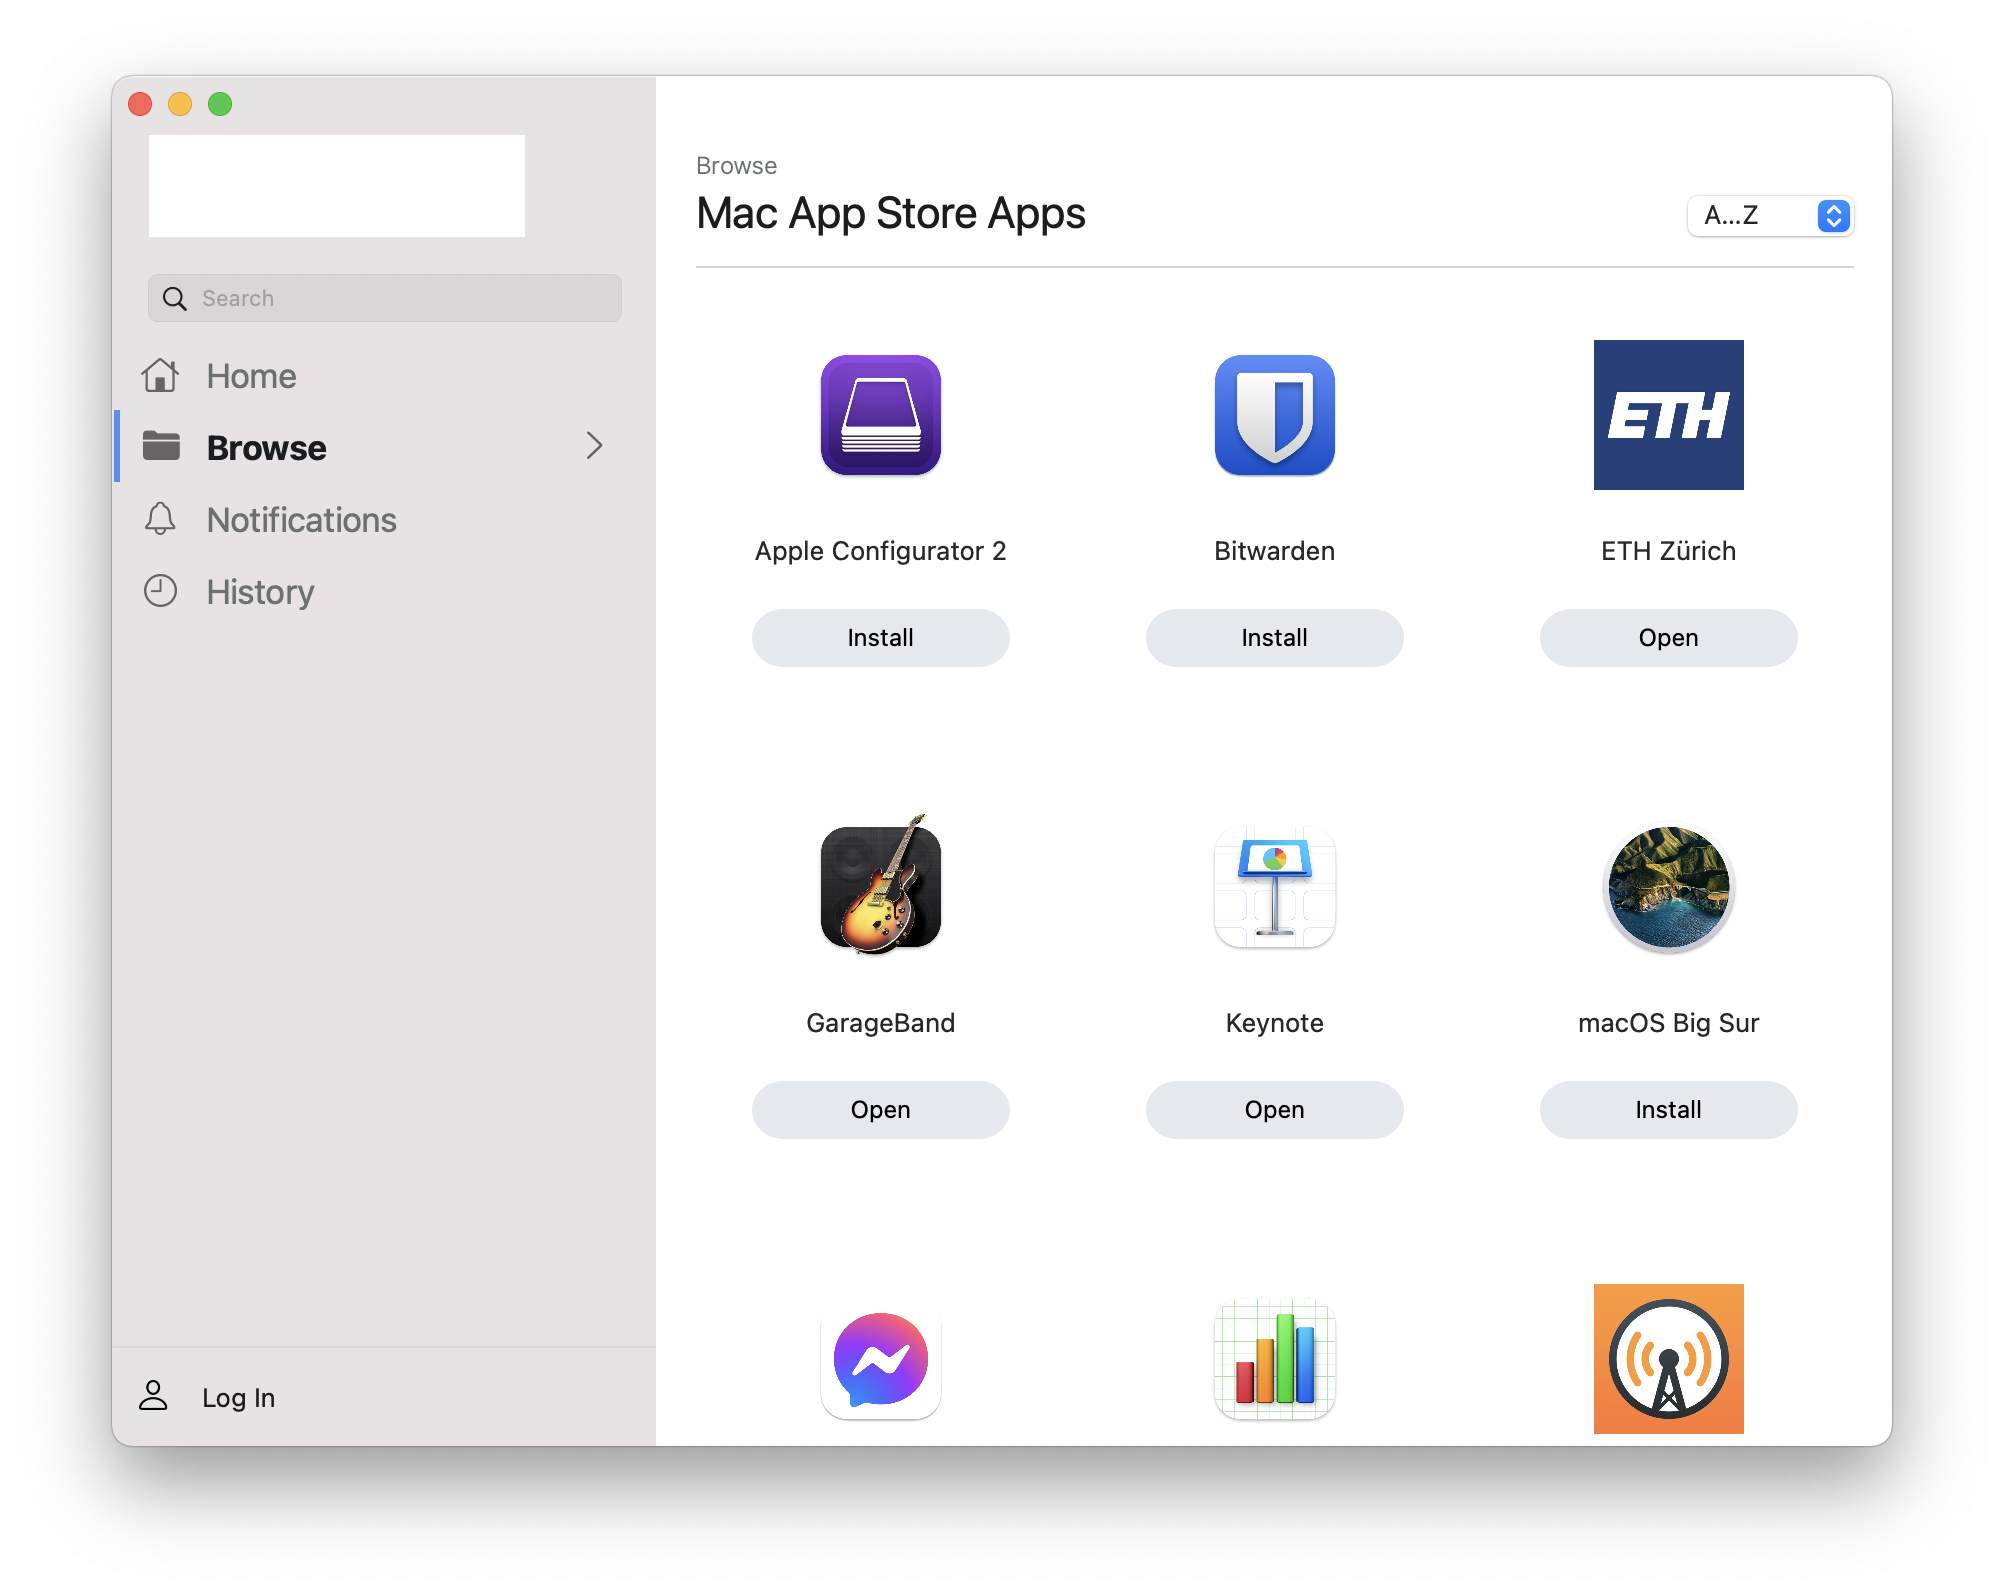
That’s it! Now you have the iOS app available in Self Service for installation on your Apple Silicon Mac.
Bugs
There are a few bugs concerning iOS App Store Apps in Jamf Pro at this time. Firstly. the icon you get from the App Store does not exactly represent the icon you will see on the Mac, because the mask that rounds the corners and adds shadow is omitted. So you’ll just get a square icon in Self Service.
Additionally, you cannot provide a description, nor is one obtained from the App Store. So the Self Service description will always be empty.
Finally, if you copy the item to another Jamf Pro instance via the API, the icon will not be transferred. So, you’ll have to go manually upload that icon again.
Conclusion
Jamf are sure to eventually iterate their UI to fully incorporate iOS app deployment to Mac, but in the meantime, with a few extra hoops to jump through, you can already push those essential iPad apps to your Macs. If you can think of any 😉